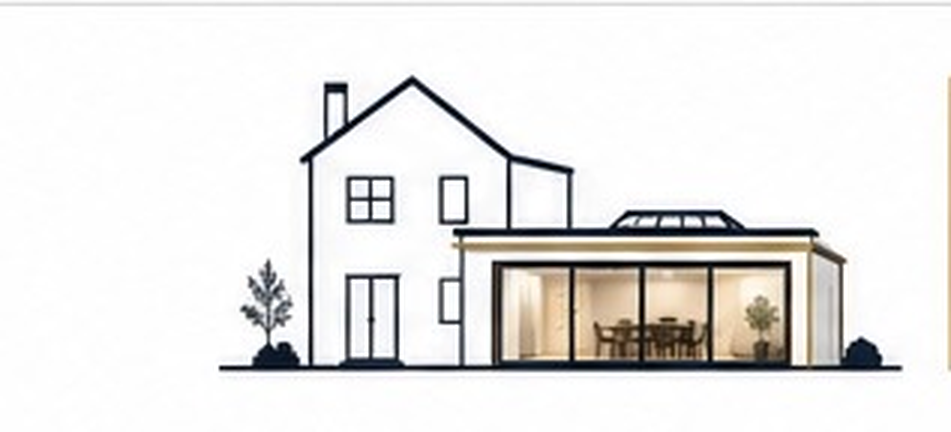
Single storey rear extension design: planner-friendly ideas
Explore planner-friendly ideas for single storey rear extension design to create a spacious, stylish living area while maximizing your space.
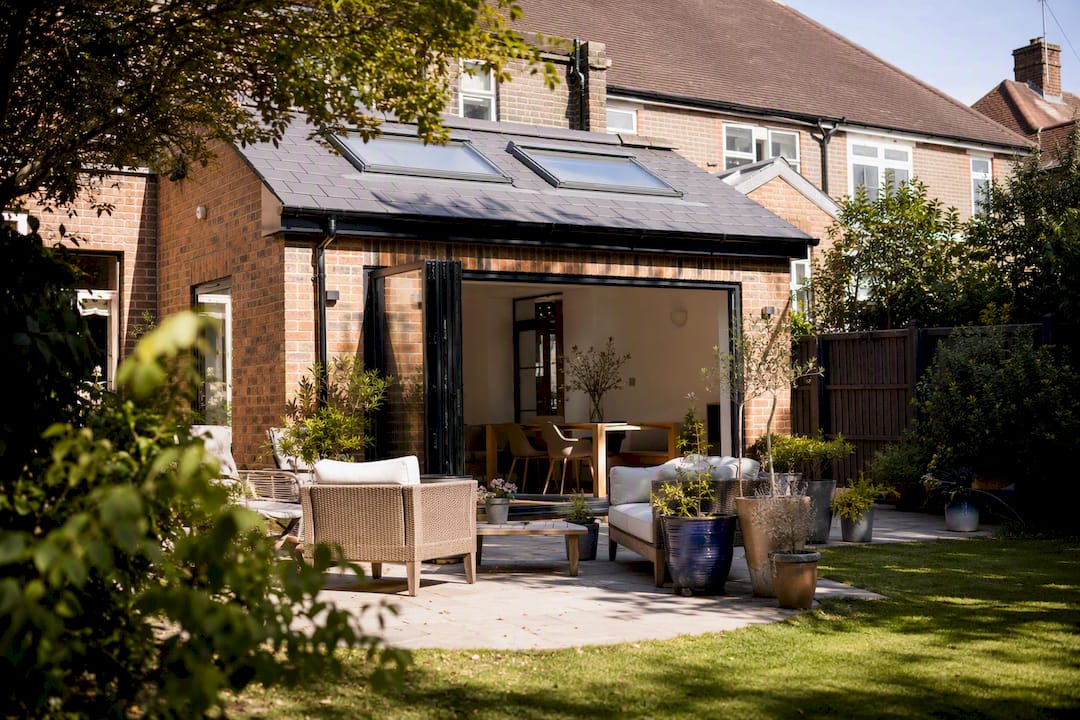
Single storey rear extension design: planner-friendly ideas
A single storey rear extension is a ground-floor addition built across the back of your house to create larger, more open living space, usually a kitchen diner or family room. Most fall within Permitted Development limits (no planning application needed), though depth, height and site coverage all have hard caps you need to check before drawing anything up.
The essentials before you sketch a single floor plan:
- Permitted Development typically allows 3m depth for attached houses and 4m for detached, extendable to 6m and 8m respectively under the prior-approval route
- Foundations and drainage often dictate the layout more than aesthetics do, particularly where manholes sit under the proposed footprint
- A rooflight or lantern strategy usually solves dark middle rooms better than extra wall glazing ever will
Two things to do this week:
- Measure your existing rear wall width and pace out the garden depth so you know what 3m, 4m, 6m and 8m actually look like on your plot
- Get an instant quote or book a site survey to see what’s realistic before you fall in love with a Pinterest board
Key Takeaways
Getting a single storey rear extension right depends on confirming your planning route early and treating daylight as a design priority equal to floor area.
| Point | Details |
|---|---|
| Check your PD limits first | Standard depths are 3m (attached) or 4m (detached), extendable to 6m/8m via prior approval. |
| Watch the 50% rule | Existing outbuildings and past extensions count against your total garden coverage allowance. |
| Design light in, not just glass | Rooflights reach deep plans better than wall glazing alone and reduce overheating risk when paired with shading. |
| Budget a 10 to 15% contingency | Drainage surprises and structural changes are the most common reasons budgets slip. |
| Consider a design-and-build route | The Extension Works offers fixed VAT-inclusive pricing, live 3D modelling and a 12-month workmanship warranty under one in-house team. |
Table of Contents
- Planning permission, permitted development and the 50% rule
- What design layout suits your house and garden?
- Which materials and roof type perform best?
- How much does a single storey rear extension cost?
- What happens on site, from survey to sign-off?
- Architect and contractor, or design-and-build?
- Getting heating, cooling and ventilation right
- How do you handle neighbour consultation and objections?
- Frequently asked questions
- Sources
Planning permission, permitted development and the 50% rule
Most single storey rear extensions don’t need planning permission at all. They fall under Permitted Development (PD) rights set out in the Town and Country Planning (General Permitted Development) Order 2015, which gives homeowners a legal right to extend without a full application, provided you stay inside the limits.
For an attached house (terrace or semi), PD allows a single storey rear extension up to 3 metres deep. Detached houses get 4 metres. Both figures can stretch further, to 6 metres and 8 metres respectively, under the “larger home extension” prior-approval route, where the council notifies neighbours and has 42 days to raise an objection before it goes through by default. Height matters too: single storey rear extensions under PD must not exceed 4 metres at the highest point, and anything within 2 metres of a boundary is capped at 3 metres eaves height.
PD rights limit the overall proportion of your garden and side land that can be covered by extensions and outbuildings cumulatively. If a previous owner built a garage or garden room, that eats into your allowance before you’ve drawn a single line. Check what’s already there before assuming you have the full 3m or 4m to play with.
PD rights disappear entirely in some circumstances. Conservation areas, Article 4 directions and listed buildings all remove or restrict the automatic right to extend, meaning you’ll need full planning permission regardless of size. It’s worth checking your council’s planning portal for Article 4 directions before you commit to a design, since they’re not always obvious from the street.
Your practical checklist for choosing a route:
- Confirm whether an Article 4 direction or conservation area status applies to your address
- Measure existing coverage against the 50% garden rule, including any past extensions or outbuildings
- Decide whether you’re within standard PD limits, need the larger-home prior-approval route, or require full planning permission
- Apply for a Lawful Development Certificate even under PD, since it isn’t mandatory but protects you at resale
The Gov on permitted development spells out the neighbour consultation tests and exceptions in more detail than most homeowners ever need, but it’s worth a skim if your project sits close to a boundary.
Pro Tip: If your extension is near the maximum PD depth, get a short pre-application planning note written before you finalise drawings. It costs a fraction of a rejected full application and often heads off neighbour objections before they become formal.
What design layout suits your house and garden?
The layout you choose depends more on your house shape than on trends. A full-width flat roof extension across the back of the property suits terraces and semis where you want maximum floor area without touching the side return. Side-return infill works for Victorian and Edwardian terraces with that awkward alley beside the kitchen, turning dead space into usable width. Wraparound extensions combine both, and garden rooms set slightly apart from the main house suit larger plots where you want separation between living and entertaining zones.
Daylight is where most single storey rear extensions succeed or fail. Design roundups repeatedly show that rooflights and lanterns are underused compared with wall glazing, yet they do more work in deep, open-plan spaces. A wall of bifold doors lights the first 3 metres of a room brilliantly and does almost nothing for the middle of a 6 metre extension. A rooflight positioned over the kitchen island or dining table solves that problem directly, because light falling from above reaches further into a room than light entering from the side.
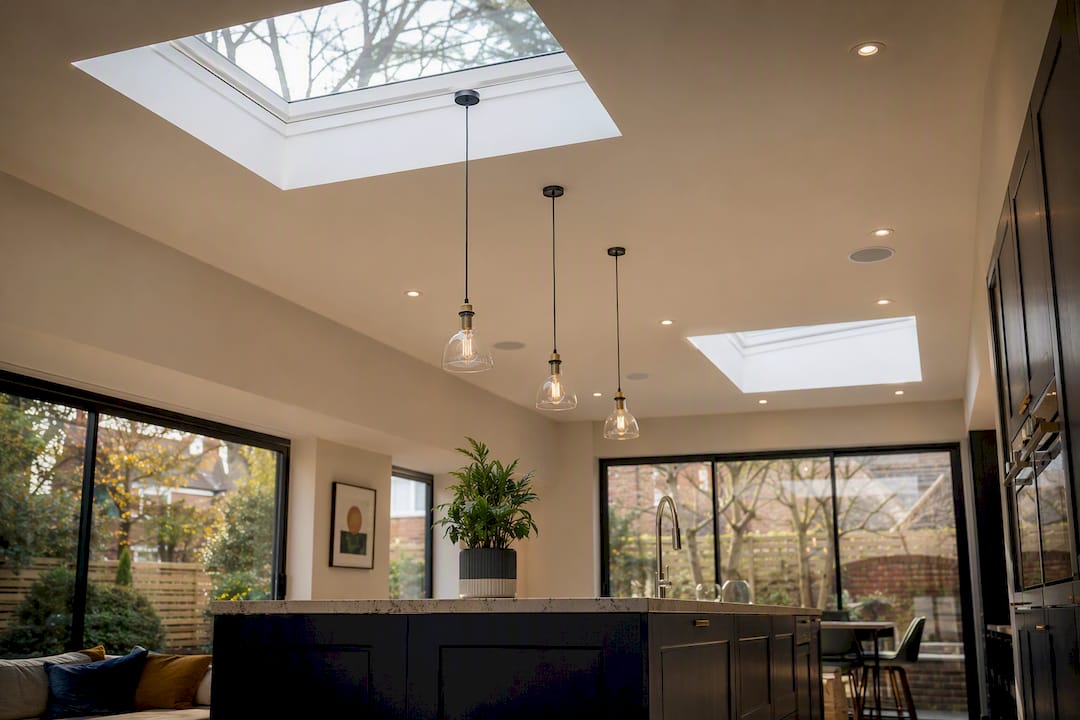
Architecture-led design guides tend to agree that daylight and flow solve more usability problems than extra floor area does, which is worth remembering before you spend your entire budget on square metres and leave nothing for glazing.
Glazing brings its own trade-offs. More glass means more garden connection but also more solar gain, and extensions with south or west-facing full glazing walls can overheat badly in summer without external shading, opening rooflights or enough thermal mass to absorb the heat.
A practical checklist for your layout:
- Keep the main circulation route to the garden clear of the cooking zone, so nobody crosses the hob to reach the doors
- Position an island so it doesn’t block the natural walking line between the kitchen and the seating area
- Choose one dominant material story (brick, render, cladding) rather than mixing several finishes
- Decide your glazing style early, since bifold, sliding and fixed rooflight choices all affect the structural opening size
Pro Tip: Walk the existing footprint at different times of day before finalising rooflight positions. The gap in usable daylight between morning and afternoon in a north-facing kitchen is often bigger than homeowners expect.
Which materials and roof type perform best?
A flat roof with rooflights is the most common choice for single storey rear extensions, and for good reason: it keeps the extension subservient in height to the main house (which planners like) while giving you flexibility to place glazing exactly where the room needs it. A lean-to pitched roof suits period properties where a flat roof would look at odds with the original architecture, though it costs more in materials and reduces headroom near the boundary.
Parapet detailing, where the roof edge is hidden behind a low wall rather than an exposed gutter line, gives a cleaner, more contemporary finish but needs careful waterproofing at the upstands to avoid leaks later.
| Element | Common choice | Main trade-off |
|---|---|---|
| Roof form | Warm flat roof with rooflights | Lower headroom loss but needs skilled waterproofing detailing |
| Roof form | Lean-to pitched | Sympathetic to period houses but higher material cost |
| Glazing | Bifold doors | Wide open aspect but frames stack visibly when open |
| Glazing | Sliding doors | Slimmer sightlines, better for narrower openings |
| Walls | Matching brick | Blends with the original house, often preferred by planners |
| Walls | Contrast cladding (zinc, anthracite aluminium) | Strong modern look, higher cost than brick-match |
Matching the original brickwork tends to smooth the planning process where it’s needed and keeps the extension visually “quiet” against the house. Contrast cladding makes more of a design statement but works best where the extension is genuinely set back or is already treated as a distinct architectural element.
On performance, a warm slab foundation with continuous insulation beneath and around the edges avoids cold bridging at the floor perimeter, and keeping the damp-proof membrane continuous between old and new construction is one of the most common places builders cut corners. Steel beams that penetrate the building envelope need proper thermal breaks, otherwise they become a direct cold bridge into the room. For a deeper look at door options specifically, this comparison of bifold and sliding doors covers sightlines and cost in more depth, and this barn, sliding and bifold comparison is a useful reference for how the door types differ mechanically.
How much does a single storey rear extension cost?
Costs vary enormously by size, glazing specification and structural complexity, but three broad bands give a useful starting point.
| Extension size | Typical scope | What drives the cost |
|---|---|---|
| Small (up to 15m²) | Basic kitchen extension, single set of doors | Foundation type, standard glazing |
| Mid-size (15 to 20 m²) | Open-plan kitchen diner, rooflight, bifolds | Structural steels, larger glazing runs |
| Larger with side return (20 m²+) | Full-width or wraparound layout | Multiple steel spans, higher-spec finishes |
Real Homes’ gallery of single storey rear extensions shows real schemes completed under £100,000, which gives a useful sense of what’s achievable at the upper end of the mid-size band once kitchen fit-out is included.
The biggest cost swings come from four places: foundation type (especially if drainage forces deeper or repositioned footings), structural steel spans needed to open up the kitchen, glazing specification (a single large sliding door costs meaningfully more than three separate window units), and whether the kitchen itself is being replaced as part of the works.
A contingency of 10 to 15% of total build cost is standard advice across the industry for single storey projects, and skipping it is one of the most common budgeting mistakes homeowners make. Unexpected drainage runs, structural surprises once walls open up, and party wall costs all tend to eat into a budget that didn’t allow for them.
Your budgeting checklist before you commit to a figure:
- Get structural calculations done early, since steel sizing affects both cost and lead time
- Factor in a party wall award if you’re building near a shared boundary
- Ask whether your quote is VAT-inclusive, since a “plus VAT” figure can shift the total by 20%
- Check drainage survey costs separately, since these are often excluded from headline quotes
For a fuller breakdown by region and specification, see this guide to rear extension costs and, for London-specific pricing, London rear extension costs. Fixed, VAT-inclusive pricing removes one of the biggest sources of budget anxiety on these projects, since you know the final number before work starts rather than discovering it at completion.
What happens on site, from survey to sign-off?
A single storey rear extension moves through a fairly predictable sequence, though the pace depends on site access and how quickly approvals come through.
- Feasibility and site survey (1 to 2 weeks): measuring the plot, checking drainage runs and confirming the PD or planning route.
- Detailed design and approvals (2 to 6 weeks): finalising drawings, structural calculations and, where needed, a Lawful Development Certificate or planning application.
- Groundworks and foundations (1 to 2 weeks): excavation, footings and the slab, weather-dependent and the stage most likely to reveal drainage surprises.
- Structural frame and roof (2 to 3 weeks): steel installation, walls up, roof structure and waterproofing.
- Windows, doors and external finishes (1 to 2 weeks): glazing fitted, brickwork or cladding completed.
- Internal fit-out (3 to 5 weeks): plastering, flooring, kitchen installation, electrics and final decoration.
- Building control inspection and sign-off: final checks against building regulations before the completion certificate is issued.
A small extension usually takes a few months on site once approvals are secured; larger projects take longer, depending on complexity and site conditions. The most common delay isn’t the build itself, it’s discovering a drainage run under the footprint that wasn’t picked up at survey stage, which can force a redesign of the foundation layout mid-project. Poor site access (narrow side gates, no room for a skip) and weather during groundworks are the other two usual suspects.
Building control inspections happen at defined stages, foundations, damp-proofing, structural steel and completion, and a snagging list before final sign-off is normal, not a red flag. For more detail on how the sequence maps against planning timescales, see this planning permission timeline and this guide to managing an extension project day to day. Site safety and welfare obligations during construction sit under HSE guidance, which applies whether you’re using a single contractor or separate trades.
Architect and contractor, or design-and-build?
Two routes exist. An architect plus a separate main contractor gives you the most control over bespoke detailing, but you’re managing two relationships and two sets of costs that can drift apart. A design-and-build provider handles design, planning, structural calculations and construction under one roof, with a single point of contact and, typically, a fixed price agreed before work starts.
Whichever route you choose, ask the same questions: is the price VAT-inclusive and fixed, or an estimate that can move? Who holds CDM responsibilities on site? Can you see sample drawings or 3D visuals before committing? What warranty covers the finished work, and for how long?
Trust signals worth checking: proper insurance, a gallery of completed projects, clear staged payments rather than one lump sum upfront, and a written workmanship warranty. Red flags include vague scopes of work with no line-item breakdown, no structural calculations provided before groundworks, no contactable references, and quotes unusually low with no explanation of what’s excluded.
Getting heating, cooling and ventilation right
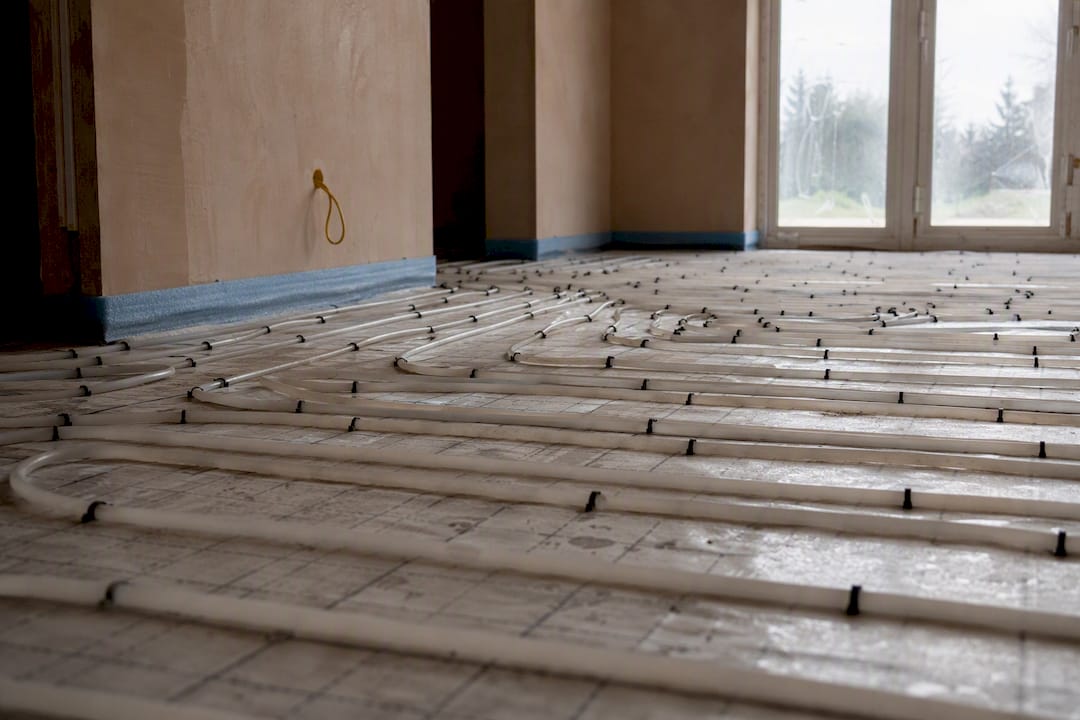
A new single storey rear extension is the easiest point in a house’s life to get heating and ventilation right, because the slab and walls are being built from scratch rather than retrofitted. Underfloor heating set into a new warm slab is widely recommended for exactly this reason: wiring and manifolds go in before the floor is poured, which is far simpler and cheaper than retrofitting pipework into an existing slab later.
Ventilation matters more than most homeowners expect, particularly in open-plan kitchen extensions with large glazed areas. Mechanical extract over the hob is a building regulations requirement, but background ventilation, trickle vents or a mechanical system, also needs planning if the room is more airtight than the rest of the house, which most new extensions are.
Cooling is the part homeowners overlook until the first hot summer. Large glazed extensions with south or west-facing doors can overheat badly without a plan for it. Effective designs pair generous glazing with openable rooflights for stack ventilation, external shading such as brise soleil or deep overhangs, and enough thermal mass in the floor and walls to absorb heat during the day and release it overnight. Retrofitting shading after the fact is far harder and less effective than designing it in from the start.
Coordinating heating, ventilation and electrics early with your designer, rather than leaving it as an afterthought once walls are up, avoids the usual scramble to chase pipework through a finished structure. The overview of mechanical, electrical and plumbing scopes gives a sense of how many separate trades typically need to align on a single project.
How do you handle neighbour consultation and objections?
Even where full planning permission isn’t required, neighbours often find out about a project the moment scaffolding goes up, and a heads-up beforehand avoids most friction. A short conversation, or a letter with your drawings attached, before work starts tends to prevent complaints that would otherwise land as formal objections during a prior-approval notification period.
Under the larger-home prior-approval route, the council formally notifies adjoining neighbours and gives them a window (typically 21 days) to object on the grounds of amenity impact, principally loss of light or an overbearing sense of enclosure. If no objection is raised, the extension proceeds without further scrutiny. If one is raised, the council assesses the impact using its own guidelines rather than automatically refusing.
Party wall matters run alongside this. If your extension involves work on or near a shared boundary wall, you’re legally required to serve a party wall notice under the Party Wall Act, separate from planning permission entirely. Getting this served early, ideally alongside your planning submission, prevents it from becoming the thing that stalls groundworks by six weeks later.
The most effective approach: share your plans informally before any formal notification lands on a neighbour’s doormat. People object far more readily to something they feel was sprung on them than to a project they were told about, even briefly, in advance.
A project manager’s view on what actually makes these projects succeed
The surprises are rarely about design taste, they’re about drainage runs nobody checked and finished floor levels agreed too late to change. The single most effective decision a homeowner can make early is settling the light strategy, rooflights versus wall glazing, before the structural drawings are finalised, because retrofitting a rooflight into a signed-off roof structure is expensive and sometimes impossible. Get your designer, structural engineer and drainage checks talking to each other in week one, not week six.
Get a fixed price and 3D model before you commit to anything
Most of the friction in this process, the drainage surprises, the vague quotes, the gap between what you imagined and what gets built, comes from decisions made without enough visibility early on. The Extension Works handles that differently: instant online quoting gives you a real, VAT-inclusive fixed price before you commit to a design conversation, and live 3D modelling lets you see the actual layout, rooflight positions and glazing before a single foundation is dug.
One team manages the entire project in-house, design, planning (including Permitted Development or prior-approval applications where needed), structural calculations and construction, so you’re not coordinating an architect, a separate contractor and a structural engineer yourself. Every project carries a 12-month workmanship warranty. If you want to see what’s achievable on a similar plot, browse the extension gallery, or check your own size limits against the Permitted Development rules. When you’re ready for numbers, get an instant quote and see a fixed price before you spend anything on drawings.
Frequently asked questions
Do I need planning permission for a single storey rear extension? Most fall under Permitted Development and need no application, provided you stay within depth, height and coverage limits and aren’t in a conservation area or subject to an Article 4 direction.
How far can a single storey rear extension go under Permitted Development? Attached houses can extend 3 metres under standard PD, or 6 metres via the larger-home prior-approval route. Detached houses get 4 metres standard, 8 metres under prior approval.
What’s the best roof type for a single storey rear extension? A warm flat roof with rooflights is the most common choice, giving flexible daylight positioning while keeping the extension lower than the main house, which planners generally prefer.
How much does a single storey rear extension design cost to build? Costs depend heavily on size and specification, with smaller kitchen extensions sitting well below mid-size, open-plan projects with structural steels and larger glazing runs.
How long does a single storey rear extension take to build? Smaller projects typically run 10 to 14 weeks on site once approvals are secured; larger side-return or wraparound extensions can take 16 to 20 weeks.