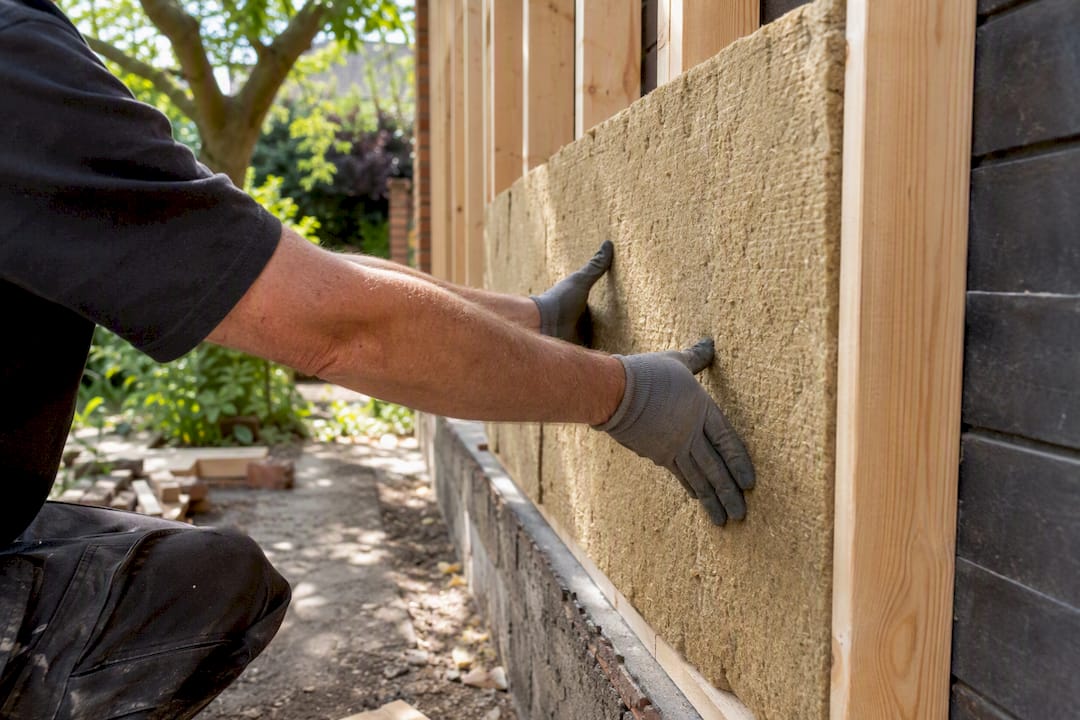
An energy efficient rear extension keeps bills down for decades
Discover how an energy efficient rear extension can lower your bills and enhance comfort for years. Learn essential design tips today!

An energy efficient rear extension keeps bills down for decades

A modest, fabric-first rear extension, insulated well beyond minimum standards, sealed against draughts and paired with a low-temperature heating system, is the most reliable way to cut running costs and improve comfort. Get the basics right before you think about solar panels or smart controls, because a leaky, under-insulated box with a heat pump bolted on will always disappoint.
If you want a working checklist for your architect or builder conversation, start here:
- Build small and build well rather than maximising floor area at the expense of detailing.
- Push insulation past Part L minimums in walls, floor and roof, aiming for continuity rather than isolated thick patches.
- Detail airtightness from day one, with taped membranes and sealed service penetrations, not an afterthought before completion.
- Specify low U-value glazing (0.8 to 1.2 W/m²K for windows) sized and positioned to avoid summer overheating.
- Pair the extension with low-temperature heating, ideally an air source heat pump feeding underfloor heating.
- Ventilate deliberately, using mechanical ventilation with heat recovery where the extension is airtight enough to justify it.
A well-detailed fabric-first retrofit and extension modelled with Passivhaus tools cut heating demand from 293 kWh/m²/yr to 77 kWh/m²/yr, a reduction of roughly 75% once insulation, airtightness and glazing were tackled together. The Extension Works builds single-storey rear extensions around exactly this fabric-first logic, and Esskay’s editorial team has drawn on UK practitioner projects to put together the guidance below.
Key Takeaways
An energy efficient rear extension depends on fabric-first insulation, continuous airtightness and low U-value glazing working together with a low-temperature heating system, not on any single upgrade in isolation.
| Point | Details |
|---|---|
| Fabric before renewables | Insulate, seal and glaze properly before adding solar PV or battery storage to avoid paying to heat wasted heat loss. |
| Match heating to the fabric | Air source heat pumps paired with underfloor heating suit airtight, well-insulated extensions far better than high-temperature radiators. |
| Detail junctions, don’t just spec insulation | Wall-to-floor, window reveals and roof parapets cause most real-world thermal bridging and demand a blower door test before plasterboard goes up. |
| Size matters more than most think | A smaller, well-detailed extension often beats a larger, poorly finished one on lifetime carbon and running costs. |
| Get a managed, fixed-price quote | The Extension Works’ instant quote tool and 3D modelling let homeowners price and visualise a fabric-first extension with fixed VAT-inclusive costs before committing to a build. |
Table of Contents
- What does an energy efficient rear extension actually mean in practice?
- What U-value should windows and doors have?
- Which heating and ventilation setup suits a low-energy extension?
- How do you stop heat escaping through gaps and junctions?
- What planning and building-regulation rules apply to a rear extension?
- How much does an energy efficient extension cost?
- What do real fabric-first extension projects teach us?
- How much noise does a rear extension let in, and how do you stop it?
- How do you know the extension is performing once it’s built?
- Getting the balance right between size, carbon and comfort
- Get a fixed-price quote for your fabric-first rear extension
- Frequently asked questions
- Sources
What does an energy efficient rear extension actually mean in practice?
“Fabric-first” means reducing the amount of heat your extension loses before you spend a pound on renewable generation or clever controls. It is the building physics equivalent of fixing a leaking bucket before buying a bigger pump. Add solar panels or a heat pump to a poorly insulated shell and you are just paying to heat the garden.
The reasoning is straightforward: insulation, airtightness and glazing are largely fixed once the walls go up, while heating systems, controls and even ceramic panels can be upgraded later. Get the fabric wrong and you are stuck with high running costs for the extension’s lifetime, likely 60 years or more. Get it right, and every future improvement, from a heat pump to a battery, performs better and costs less to run.
Wall build-ups: what actually works
Three approaches dominate current UK rear extension practice, and each suits a different house type and budget.

Timber frame with wood-fibre board insulation is the workhorse choice for most single-storey extensions. It is quick to erect, achieves strong U-values without excessive wall thickness, and wood fibre’s hygroscopic properties help regulate humidity and prevent moisture problems when the extension meets an older solid-walled house. A recent Ealing retrofit combined timber framing, wood-fibre insulation and lime render, and the practice reported improved thermal performance while allowing underfloor heating and pre-wiring for solar PV throughout the build.
Insulated cavity walls with external insulation suit homeowners who want a more conventional masonry appearance without sacrificing performance. External insulation wraps the thermal envelope around the structure, minimising the risk of cold bridging at floor and roof junctions, though it typically adds more to the wall’s overall thickness than a well-detailed timber frame.
Hempcrete and timber occupies a smaller but growing niche for homeowners prioritising embodied carbon. A hempcrete and timber extension in Upper Norwood used hempcrete blocks in a timber frame to create a breathable, low-carbon addition, sequestering carbon during manufacture rather than releasing it. The trade-off is programme: hempcrete needs curing and drying time factored into the build schedule, so it suits clients who aren’t racing to move back in.
Foundations, floors and roofs
Foundation choice matters more than most homeowners realise. Screw piles, rather than traditional concrete strip foundations, cut excavation, shorten programmes and meaningfully reduce embodied carbon, according to practitioners working on timber-frame retrofits. They are not right for every ground condition, but where they work, they are worth raising with your structural engineer early, since they change the groundworks sequence and cost.
Floor insulation is frequently skimped because it is invisible once the finish goes down. Insulate below the slab (or within the floor void for suspended timber) to at least the thickness your SAP calculation demands, and check continuity where the new floor meets the existing house, a classic weak point for heat loss.

Roofs on single-storey rear extensions are usually flat or low-pitch, and this is where green or brown roof options earn their keep. Beyond biodiversity value, green roofs help manage surface-water runoff and moderate local microclimate, a genuine bonus if your garden already struggles with drainage.
Managing moisture and vapour risk
Breathable assemblies (wood fibre, lime renders, hempcrete) reduce the risk of trapped moisture compared with impermeable internal insulation systems, particularly important when your extension meets a solid-walled Victorian or Edwardian house. That choice of breathable versus impermeable often dictates your finishing decisions and drying times, so it needs settling before you commit to a build-up rather than during snagging.
Pro Tip: Ask your builder to show you the junction detail where the new extension’s insulation meets the existing wall’s insulation line, on paper, before work starts. This single junction causes more thermal bridging and damp complaints than almost anything else in rear extension projects.
For inspiration on layouts that keep these build-ups simple and buildable, planner-friendly design ideas are worth reviewing before you finalise your brief.
What U-value should windows and doors have?
Aim for whole-window U-values between 0.8 and 1.2 W/m²K, comfortably ahead of Part L’s baseline. Double glazing at the lower end of that range will satisfy most projects; triple glazing earns its extra cost mainly on north-facing elevations, in rooms you’ll heat continuously, or where street noise makes the acoustic improvement a bonus worth having anyway.
Orientation dictates far more than most homeowners expect. A large expanse of south-facing glass without an overhang, brise soleil, or deep reveal will overheat a kitchen extension by mid-afternoon in June, no matter how good the U-value is. Rooflights compound this: a single well-placed rooflight over a kitchen island transforms the room’s daylight, but two or three scattered across a flat roof can turn a small extension into a greenhouse. Position them away from direct midday sun paths where possible, or specify solar control glass.
- Bifold doors offer the widest opening and best connection to the garden, but more frame junctions mean more potential air leakage paths if installation is rushed.
- Sliding doors typically achieve better airtightness per metre of opening and suit narrower gardens where a full bifold sweep isn’t needed.
- Fixed glazing panels cost less to run (nothing to seal, nothing to hinge) and are the easiest element to get right on U-value, useful where you want maximum glass with minimum thermal risk.
Glazing ratio, the proportion of wall given over to glass, has a direct bearing on both heating demand and lighting bills. A generously glazed extension cuts artificial lighting use during the day, which matters given how much of a household’s electricity goes on lighting and appliances rather than heating in a well-insulated home. Push the ratio too high without matching U-values and shading, though, and the heat loss (and summer heat gain) cancels out the daylight benefit. For further practical detail on door specification affecting thermal performance, this is where the balance between opening size and thermal control is worth researching in detail before finalising your glazing schedule. Smaller, carefully glazed extensions consistently perform well; you can see the principle applied in these rear extension layouts designed for light and value.
Which heating and ventilation setup suits a low-energy extension?
A well-insulated, airtight extension changes what “good heating” means. Once heat loss drops, you no longer need a system capable of blasting the room warm quickly, you need one that holds a steady, low temperature efficiently. That shift favours air source heat pumps over gas boilers for new extensions, because heat pumps run most efficiently at the lower flow temperatures (35 to 45°C) that underfloor heating uses, rather than the 60 to 70°C radiators typically demand.
- Size the heat pump to the whole house, not just the extension, since undersizing forces the system to rely on immersion backup, quietly eroding the efficiency gains you built the extension to achieve.
- Specify underfloor heating in the new space wherever floor buildup allows it; it distributes heat evenly at low temperatures and suits the slab-on-insulation floors most rear extensions already need.
- Fit mechanical ventilation with heat recovery (MVHR) once airtightness improves enough to trap stale air and moisture, particularly in kitchens with less natural ventilation than older houses relied on. Where the extension isn’t airtight enough to justify MVHR’s ductwork and cost, simple mechanical extract ventilation in the kitchen and bathroom, backed by trickle vents, still does the job.
- Pre-wire for solar PV and a home battery even if you can’t afford them now. Running conduit and a spare consumer unit way during the build costs very little; retrofitting it later means chasing walls and disrupting a finished room.
- Zone the extension separately from the rest of the house on the heating controls, so the new, better-insulated space isn’t calling for heat at the same rate as older, leakier rooms nearby.
Pro Tip: If your budget only stretches to one “invest now, upgrade later” decision, choose underfloor heating pipework over the heat pump itself. Pipes are nearly impossible to retrofit once the floor is finished; the heat pump unit outside can be swapped or added within a day.
Hot water is usually simplest left to the heat pump’s own cylinder, sized generously enough that showers and one bath don’t drain it, rather than adding a second, separate system just for the extension.
How do you stop heat escaping through gaps and junctions?
Insulation only performs to its rated value if the assembly around it is continuous and sealed. Gaps at junctions, not the insulation itself, are where most real-world performance gaps between design and reality come from.
- Wall-to-floor junctions need insulation and airtightness membrane to wrap continuously around the corner, not stop at the slab edge and restart in the wall.
- Window and door reveals are common weak points; insist on a taped airtightness membrane dressed into the reveal before the frame goes in, not sealant applied afterwards as a fix.
- Parapets and roof-to-wall junctions on flat-roofed extensions need insulation carried past the wall plate, since a break here creates a cold bridge that can cause condensation and mould on the internal finish.
- Service penetrations (extractor fan ducts, cable entries, waste pipes) each need individually sealed grommets or collars; a dozen small unsealed holes add up to a significant air leak.
Ask for a blower door (air pressure) test once the building is substantially airtight but before plasterboard goes up, so any leaks found can still be fixed easily. Testing after decoration means every fix involves cutting into a finished wall. A good contractor will welcome the test; a defensive one is telling you something.
On site, the simplest quality check is visual: look for continuous, taped membranes with no gaps, staples through the membrane resealed with tape, and no daylight visible through any junction before the internal lining goes up.
What planning and building-regulation rules apply to a rear extension?
Most single-storey rear extensions to a house can proceed under permitted development rather than requiring a full planning application, provided they stay within set limits on depth, height and proximity to boundaries. The official permitted development guidance sets out exactly where those limits sit and when a larger or more visible extension needs a full application or a prior approval notification instead.
- Depth and eaves height limits trigger full planning permission once exceeded, so confirm your design against current thresholds before committing to a layout.
- Party wall matters need addressing separately from planning; a shared boundary wall or foundation close to next door usually needs a party wall agreement regardless of permitted development status.
- Part L of the Building Regulations sets the energy-performance targets your extension must hit, covering U-values, airtightness and heating system efficiency, and it’s the standard your SAP calculation or Building Regulations application will be checked against.
- Structural calculations for the new opening in the existing wall, foundations and roof loading need sign-off from a qualified structural engineer before building control will approve the work; this is worth commissioning early, not once the design is fixed.
- CDM (Construction, Design and Management) duties apply on most domestic projects, and the HSE’s construction guidance explains when a principal designer or principal contractor role needs formally assigning, even on a modest single-storey job.
Detailed planning advice for your specific project is worth reading in full before you brief an architect; rear extension planning rules explained for 2026 covers the current thresholds and notification routes in more depth. Expect four to eight weeks for a prior approval decision if you fall outside straightforward permitted development, longer if a full application is needed.
How much does an energy efficient extension cost?
Costs vary enormously by location, structural complexity and specification, but the pattern across most projects is consistent: fabric and airtightness deliver the best long-term return per pound spent, while some finishes and gadgets deliver far less.
- Structural work and foundations typically consume the largest single share of budget, and this is not the place to cut corners regardless of energy ambitions.
- Insulation upgrades beyond Part L minimums cost relatively little extra against the total build price, yet deliver savings for the building’s entire lifetime, making this the highest-return line item in the whole project.
- Airtightness detailing (membranes, tapes, careful labour) adds modest cost but only works if specified and checked, not assumed.
- Glazing upgrades from double to triple glazing cost more upfront and suit specific elevations rather than the whole extension.
- Smart heating controls and finishes are the easiest items to defer to a later phase without compromising the building’s core performance.
A sensible phasing strategy: get the fabric, airtightness and heating system right in the initial build, since these are hardest and most disruptive to retrofit later. Defer solar PV, battery storage or premium finishes if the budget is tight, but pre-wire and pre-plumb for them now while walls are open. Detailed cost breakdowns for rear extension budgets help set realistic expectations before you approach builders for quotes, and understanding the structural calculations your project needs early avoids costly redesigns mid-build.
What do real fabric-first extension projects teach us?
Two recent UK projects show how these principles play out once builders are actually on site.
An Edwardian house in Ealing was retrofitted and extended using timber framing, wood-fibre insulation and lime render, with underfloor heating and pre-wiring for solar PV built in from the start. The practice reported improved thermal performance across the whole property, not just the new extension, because the breathable build-up worked with the existing solid walls rather than trapping moisture against them.
A London semi in Upper Norwood took a different route: hempcrete blocks within a timber frame created a breathable, carbon-sequestering extension. Hempcrete needs curing time factored into the programme, and vapour-open behaviour means finishing decisions (lime plaster rather than gypsum, for instance) have to follow the material’s logic rather than standard practice.
The clearest lesson from both projects is that material choice dictates programme as much as design does. A breathable, low-carbon build-up rewards patience during construction with lower running costs and better indoor air quality for decades afterwards.
For homeowners who want this level of fabric-first thinking without managing multiple trades themselves, The Extension Works offers an instant online quote tool with live 3D modelling, fixed VAT-inclusive pricing and a 12-month workmanship warranty, taking a design from sketch to signed-off build under one in-house team.
How much noise does a rear extension let in, and how do you stop it?
Acoustic performance rarely makes anyone’s initial wish list, then becomes the first thing they notice once they’re living in the space. Glazing is usually the weakest link: a large expanse of bifold or sliding doors, however good its U-value, transmits more external noise than a solid insulated wall unless you specify acoustic laminated glass in the outer pane.

Flat roofs on single-storey extensions can amplify rain noise noticeably compared to a pitched, tiled roof, particularly with a lightweight built-up roof deck. A denser roof build-up, or an additional acoustic layer beneath the waterproofing membrane, reduces this without much extra cost.
Party walls matter too, especially where your rear extension sits close to a neighbour’s boundary. Dense masonry or a well-detailed timber frame with mineral wool infill both perform reasonably, but continuity again matters more than material choice; a gap at a service penetration undoes acoustic performance just as it undoes thermal performance.
Inside the extension itself, hard floors and large glazed areas create reflective surfaces that make open-plan kitchen extensions surprisingly loud day to day, independent of anything coming from outside. Soft furnishings, acoustic ceiling treatments in larger open-plan spaces, and avoiding unbroken hard parallel surfaces all help, and cost far less to address at design stage than after you’ve moved the furniture in.
How do you know the extension is performing once it’s built?
The only way to know whether your fabric-first specification actually delivered is to check afterwards, and most homeowners never do. Smart thermostats and energy monitors that track room-by-room usage give a rough sense of whether the new space is holding heat efficiently compared with the rest of the house.
A simple, low-cost approach: compare your gas or electricity usage for a comparable period before and after the extension was completed, adjusted for the extra floor area. If bills rise by more than the added square metreage would suggest, something in the fabric or heating specification underperformed, worth investigating while snagging and warranty periods are still open.
Thermal imaging, done on a cold evening with the heating running, is a genuinely useful post-completion check and can reveal a missed insulation gap or cold bridge that wasn’t visible during construction. Several contractors now offer this as part of handover; if yours doesn’t, an independent thermal survey is a modest cost against the value of catching a defect early.

User feedback matters as much as instrumented data. If a room consistently feels too warm in summer or draughty near the bifold doors in winter, that’s a design or installation issue worth raising under warranty rather than living with for the next twenty years. Projects that have tracked before-and-after energy use, including deep retrofit case studies modelled with Passivhaus tools, consistently show that the biggest gap between predicted and actual performance comes from airtightness shortfalls rather than insulation thickness, reinforcing why the on-site checks in the earlier detailing section matter more than the spec sheet alone.
Getting the balance right between size, carbon and comfort
Bigger is not automatically better. A smaller, carefully insulated and airtight extension frequently has a lower lifetime carbon footprint than a larger one built to minimum standards, because the embodied carbon in extra structure, foundations and materials is substantial relative to the operational savings a bigger room ever earns back.
The trade-off homeowners actually face is between embodied carbon (the emissions baked into materials and construction) and operational savings (the emissions and cost you avoid over decades of use). There’s no universal right answer. A family that will occupy the house for thirty years can justify more upfront investment in fabric and low-carbon materials than someone planning to sell in five. What matters is making that decision deliberately, rather than defaulting to the biggest extension the budget allows and hoping the heating system fixes the rest.
If you want certainty rather than guesswork on how these choices play out for your specific house, a managed quote from a team that designs, prices and builds under one roof takes the risk out of specification decisions you’d otherwise be making blind.
Get a fixed-price quote for your fabric-first rear extension
The Extension Works is the more certain route to a low-energy rear extension compared with piecing together an architect, a separate builder and your own building-control liaison. Its instant Extension Quote Tool prices your project with fixed VAT-inclusive figures from the outset, so the insulation upgrades, glazing specification and heating system discussed in this article get costed properly before you commit, not discovered as an expensive surprise mid-build.

Live 3D modelling lets you see how glazing position, roof shape and room layout affect daylight and heat loss before a single brick is laid, cutting down the change orders that usually blow both budget and programme. Every project runs through one in-house team from initial sketch to final sign-off, backed by a 12-month workmanship warranty. If you’re ready to see what a fabric-first single-storey rear extension would cost for your house, get your instant quote and start with real numbers instead of estimates.
Frequently asked questions
Do I need planning permission for an energy efficient rear extension? Most single-storey rear extensions fall under permitted development if they stay within depth and height limits, though party wall agreements and structural sign-off are usually still required regardless of planning status.
Is triple glazing worth it for a rear extension? Triple glazing earns its cost mainly on north-facing elevations or rooms you heat continuously; double glazing at a strong U-value (around 1.0 to 1.2 W/m²K) satisfies most other situations.
Do I need MVHR in a small rear extension? Only if the extension is airtight enough to trap moisture and stale air; a less airtight space is usually better served by simple mechanical extract ventilation in the kitchen.
What’s the single highest-return investment in an energy efficient extension? Insulation and airtightness detailing, because they cost relatively little against the total build price yet affect running costs for the building’s entire lifetime.
Sources
Recommended
- Rear extension cost in 2026: a UK homeowner’s guide — The Extension Works
- Small rear extension ideas that maximise light and value — The Extension Works
- Single storey rear extension design: planner-friendly ideas — The Extension Works
- Rear extension cost London: 2026 guide for homeowners — The Extension Works