10–15 Year Payback: Fabric First Extension Design in England
England homeowners: a fabric first guide to meet Part L and Part O, hit U values and airtightness targets, and secure a performance aware quote.
10–15 Year Payback: Fabric First Extension Design in England
Build fabric-first: hit the Approved Document L U-values for your extension’s walls, roof, floor and glazing, and check overheating risk under Part O before you finalise the drawings. Do that first, then commission performance-aware plans or run an instant quote through a design-and-build service. Two things anchor the whole project: Building Regulations compliance and, if you’re adding a heat pump, the Boiler Upgrade Scheme grant.
TL;DR:
- Most extensions in England achieve the best value by prioritizing fabric improvements, such as insulation and airtightness, before adding renewable technology like heat pumps and PV.
- Achieving airtightness below 3 m3/hr/m2 and incorporating mechanical ventilation with heat recovery significantly reduces long-term energy costs and improves comfort.
- Construction methods like timber frame and SIPs are fastest to meet U-value targets with low embodied carbon, while insulation choice impacts both performance and moisture control.
- Proper junction sealing, including window reveals and service penetrations, is essential for meeting airtightness targets and requires explicit contract specifications.
- Budgeting around £8,000 to £14,000 for a heat pump and £5,000 to £7,000 for a PV array, with paybacks typically 10 to 15 years, depends heavily on initial fabric upgrades.
Table of Contents
- What are the energy efficient extension design targets to aim for?
- Why does fabric-first matter more than clever technology?
- Which construction methods actually hit the U-value targets?
- How do you get airtightness right on site?
- Do you need MVHR, and how do you stop the extension overheating?
- What glazing and rooflight specification actually makes sense?
- How do heat pumps, underfloor heating and solar PV fit together?
- When do you need planning permission, and what does Building Control expect?
- What should you budget for, and where does the money pay back fastest?
- How do you cut embodied carbon without blowing the budget?
- How should the extension sit on the plot for the best comfort?
- Case study: how The Extension Works delivers energy-aware rear extensions
- What are the practical steps from enquiry to handover?
- Ambition, budget and where the real value sits
- Get a performance-aware quote for your extension
- Sources
What are the energy efficient extension design targets to aim for?
Before you sketch a single wall, get the numbers straight. Approved Document L sets the legal floor for every element of your extension, and it pays to treat these as minimums rather than goals.
These figures come straight from Table 4.2 of the conservation of fuel and power document, and they’re echoed by trade reference summaries used across the industry. Airtightness matters just as much as insulation thickness. Most standard new builds have airtightness levels around 8 to 10 m3/hr/m2 at 50 Pa, but a genuinely energy efficient extension design should target significantly lower airtightness, aiming for a substantially reduced air change rate verified by a blower-door test on completion.
Ventilation follows from that airtightness number. Tighten the building envelope and trickle vents alone won’t cut it; you’ll need mechanical ventilation with heat recovery (MVHR) to keep air fresh without losing the heat you’ve just paid to retain. Meanwhile, Part O requires you to check that your new glazing and layout won’t cook the room in July.
Three rough packages help set expectations:
- Good (Building Regs compliant): meets Part L minimums, natural ventilation, standard double glazing. Lowest upfront cost, higher long-term bills.
- Better (recommended sweet spot): fabric pushed 15 to 20% beyond minimums, MVHR fitted, triple glazing on exposed elevations. Moderate premium, strong payback.
- Premium (near-Passivhaus): airtightness below 3 m3/hr/m2, whole-house thermal modelling, triple glazing throughout. Highest cost, best comfort and running costs.
Most homeowners in England get the best value landing on “better.”
Why does fabric-first matter more than clever technology?
Fabric-first means spending your budget on insulation, airtightness and glazing before you spend it on heat pumps, solar panels or smart controls. Get the building envelope right and everything installed afterwards works harder for less money. Get it wrong and no amount of technology fixes a leaky, poorly insulated shell.
The logic is straightforward: a heat pump sized for a draughty extension costs more to buy, more to run, and still leaves cold spots near windows and floors. Size the same heat pump for a tight, well-insulated envelope and it becomes smaller, cheaper, and quieter, because it isn’t fighting constant heat loss.
Design experts working on retrofit projects consistently make the same point: the largest gains come from treating the extension and the existing house as one thermally continuous system, not two separate problems.
Approved Document L applies stricter U-value backstops to extensions than to the rest of an existing house precisely because extensions are a rare chance to build the fabric right from scratch, without disturbing occupied rooms. That’s why Table 4.2 sets tighter limits on the new build element than on retained fabric elsewhere in the property.
Fabric-first sequencing for your budget:
- Insulation specification and thickness (walls, roof, floor) locked in first.
- Airtightness strategy and junction detailing agreed before construction starts.
- Glazing performance and solar control chosen to match the fabric, not as an afterthought.
- Heating and ventilation are sized once fabric performance is known, not before.
- Renewables (PV, battery storage) added last, sized to the reduced demand.
Design experts widely note that fabric-first interventions deliver the largest, most durable comfort gains of any single design decision on an extension. Get the sequencing backwards and you’ll overspend on plant that’s oversized for a leaky box.
Which construction methods actually hit the U-value targets?
Timber frame and structural insulated panels (SIPs) tend to be the fastest route to genuinely low U-values with genuinely low embodied carbon. Both arrive largely pre-insulated, cut build time on site, and make hitting 0.15 W/m²K on walls straightforward without excessive thickness. Masonry cavity wall construction can still get there, but it needs thicker cavities, careful thermal-bridge detailing at lintels and reveals, and generally costs more to reach the same performance.
Insulation material choice matters as much as the construction method:
- PIR (polyisocyanurate) boards: high performance per millimetre (around 0.022 W/mK), widely used in cavities and roofs, but higher embodied carbon than natural alternatives.
- Wood fibre: good thermal performance with better moisture buffering, popular in breathable timber-frame builds, slightly thicker than PIR for equivalent U-values.
- Sheep’s wool: naturally moisture-tolerant and low embodied carbon, but needs greater thickness and costs more per square metre.
- Cellulose (recycled newspaper): dense-packed into timber frame cavities, cost-effective and low carbon, though it needs careful installation to avoid settling.
To hit a 0.18 W/m²K wall U-value in typical English conditions, you’re looking at roughly 100 to 140mm of PIR-equivalent insulation in a timber frame cavity, or considerably more in a masonry cavity wall unless you add internal or external wood fibre boards. Roofs need more: expect 150 to 200mm depending on material and whether you’re insulating between rafters, above them, or both.
Moisture control differs by method. Timber frame and SIPs need a well-detailed vapour control layer on the warm side and breathable membranes on the cold side to avoid interstitial condensation. Masonry cavity walls rely on the cavity itself as a moisture break, but any bridging insulation across the cavity needs careful specification to avoid creating a cold spot where condensation can form.
Timber frame and SIPs are commonly the most practical path to super-insulation and low-embodied-carbon builds for UK extensions, while masonry can still be tuned to high fabric performance with thicker insulation and thermal-bridge control.
How do you get airtightness right on site?
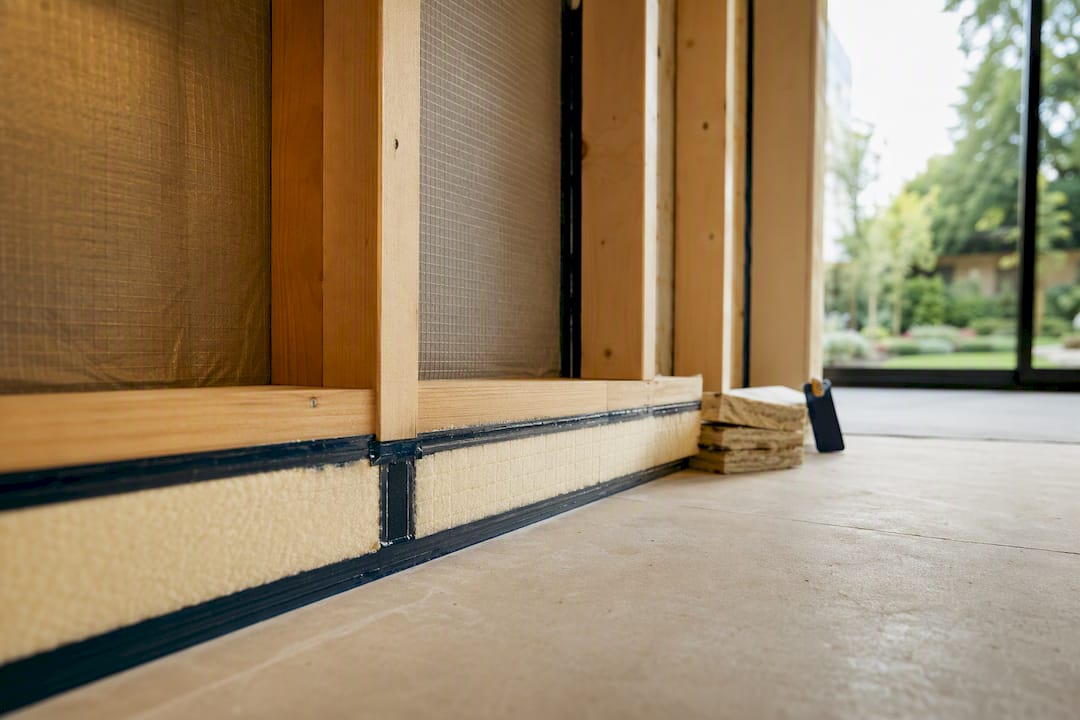
Airtightness is won or lost at junctions, not in the insulation you specify. A number like 3 to 5 m3/hr/m2 at 50 Pa sounds abstract, but in practice it means the gap between your skirting board and floor, the seal around a window reveal, and the collar around a soil pipe penetration all get taped, sealed or foamed with the same care as the insulation itself.
Insist your contract names these junctions explicitly:
- Wall-to-floor junction: continuous airtightness membrane lapped and taped, not just insulation pushed into the gap.
- Wall-to-roof junction: particularly at the eaves, where ventilation battens can accidentally create an air leak path if not detailed properly.
- Window and door reveals: taped membranes around the frame, not just mastic sealant, which degrades over time.
- Service penetrations: every pipe, cable and vent through the airtight layer sealed with a proper grommet or collar, not expanding foam alone.
Schedule your blower-door test for after first fix but before final decoration, so any leaks found can still be remediated without ripping out finished plasterwork. A typical test costs a few hundred pounds and takes half a day; remediation, if needed, usually means resealing a handful of junctions rather than anything structural.
Get the contract terms right before work starts:
Pro Tip: Specify in the contract who pays for the test, who pays for any remediation if the target is missed, and whether a second test is included in the price. A contractor confident in their detailing won’t balk at this; one who hedges probably hasn’t done it before.
Expect a UKAS-accredited tester’s certificate as evidence for Building Control, not just a verbal assurance. This document forms part of your compliance file alongside your SAP calculation.
Do you need MVHR, and how do you stop the extension overheating?
Once your extension’s airtightness drops below roughly 5 m3/hr/m2, natural ventilation through trickle vents and opening windows alone won’t clear moisture and stale air properly. That’s the point where mechanical ventilation with heat recovery earns its keep, recovering up to 90% of the heat from outgoing stale air while bringing in filtered fresh air. Installed cost typically runs from around £3,000 to £6,000 for a single-zone system serving an extension, with running costs adding a modest amount to electricity bills, offset by the heating savings from not venting warm air outside.
Overheating is the other side of the airtight coin. Approved Document O now requires designers to demonstrate that a new habitable room won’t overheat, and large glazed extensions with south-facing bifold doors are exactly the profile that triggers scrutiny. Overheating risk increases sharply with glazed area, and Part O compels a coordinated response across shading, glazing specification and ventilation rather than treating them as separate decisions.
Passive mitigations worth building into the design:
- External shading such as overhangs, brise soleil or deciduous planting on south and west elevations.
- Solar control glass or coatings that cut solar heat gain without darkening the room excessively.
- Openable rooflights or high-level windows to enable night-time purge ventilation in summer.
- Light-coloured internal and external finishes to reduce heat absorption.
An overheating assessment is typically required whenever a habitable room has significant glazing, particularly on south or west-facing elevations, and can range from a simple checklist calculation to full dynamic thermal modelling on larger or more exposed schemes. MVHR units need annual filter changes and periodic commissioning checks to keep performing at their rated efficiency, so factor a basic maintenance routine into your ownership plan from day one.
What glazing and rooflight specification actually makes sense?
Standard double glazing in a new frame typically achieves around 1.4 to 1.6 W/m²K, right at the Part L backstop. Triple glazing pushes that down to 0.8 to 1.0 W/m²K, and on north-facing or heavily exposed elevations, that difference in comfort near the glass is noticeable enough to justify the premium, usually 15 to 25% more than an equivalent double-glazed unit.
South and west-facing glass need a different conversation entirely, one about solar control rather than just U-values.
- Look for glazing with a lower solar heat gain coefficient (SHGC) on elevations that catch afternoon sun, to cut unwanted heat gain without sacrificing daylight.
- Fixed external shading, overhangs or a pergola over bifold doors reduces solar gain passively, with no running cost and no maintenance beyond the structure itself.
- Internal blinds help but work less effectively than external shading, since heat has already passed through the glass by the time a blind intervenes.
- Rooflights bring excellent daylight deep into a single-storey extension, but they carry a higher limiting U-value of 2.2 W/m²K under Approved Document L, so balance rooflight area against fabric performance elsewhere.
Rooflights are worth the trade-off in most rear extensions because the daylight gain genuinely transforms how a room feels, but oversized rooflights without shading or venting mechanisms are one of the most common causes of summer overheating complaints. If you’re planning a large glazed rear elevation, our guide to small rear extension ideas covers how to balance glazing and daylight without tipping into overheating territory. Large glazed extensions on terraced properties also tend to draw more planning attention, so check appearance and overlooking considerations early rather than after drawings are finalised.
How do heat pumps, underfloor heating and solar PV fit together?
Air source heat pumps typically deliver three to four times the heating efficiency of a gas boiler, meaning for every unit of electricity in, you get three to four units of heat out. That efficiency, measured as coefficient of performance (COP), rises when the heat pump runs at lower flow temperatures, which is exactly what underfloor heating provides. Radiators need hotter water to feel warm; underfloor heating spreads the same heat over a larger area at a gentler temperature, which is why the two pair so naturally in a new, well-insulated extension.
Solar PV and battery storage follow a similar logic to fabric-first: size them after you know your actual demand, not before. A well-insulated, airtight extension with a heat pump has a smaller, more predictable electricity demand, which means a modest PV array, often 3 to 4kW for a single extension’s contribution, can genuinely offset a meaningful share of running costs. Adding battery storage lets you use more of that solar generation in the evening rather than exporting it cheaply and buying electricity back later.
Support and sizing at a glance:
- The Boiler Upgrade Scheme offers a grant towards qualifying air source heat pump installations, which can reduce the typical considerable installation costs significantly.
- Underfloor heating in a new extension slab typically adds £40 to £70 per square metre over standard screed and radiator pipework.
- A 3 to 4kW PV array suited to a single extension roof typically costs £5,000 to £7,000 installed before any battery.
- Battery storage adds £3,000 to £6,000 depending on capacity, and pays back fastest on properties with high daytime export and evening demand.
Running cost expectations vary with usage, but a properly sized heat pump on a fabric-first extension should cost noticeably less to run per square metre than an equivalent gas-heated space, once the improved insulation and lower flow temperatures are factored in.
When do you need planning permission, and what does Building Control expect?
Many single-storey rear extensions in England fall under permitted development, avoiding a full planning application, but the thresholds depend on your extension’s depth, height and proximity to boundaries. Our guide to permitted development and extension rules breaks down the specific limits, because getting this wrong at the outset is one of the most common causes of delay.
Whether or not planning permission is required, Building Control approval always is, and that means assembling a specific evidence pack:
- SAP calculation: demonstrates the extension’s overall energy performance against Part L requirements, produced by an accredited energy assessor.
- U-value calculations: for every element, walls, roof, floor, windows, showing compliance with Table 4.2’s limiting values.
- Airtightness evidence: either a design target with a commitment to test, or a completed blower-door certificate if testing has already happened.
- Structural calculations: covering foundations, beams and any load-bearing alterations to the existing house, particularly where openings are formed.
- Overheating assessment: required where glazing area and orientation trigger Part O scrutiny, as covered earlier.
The homeowner’s guide from South Worcestershire Building Control lays out a similarly practical sequence for anyone building outside London who wants a second reference point.
Appoint your energy assessor and structural engineer early, ideally alongside your architect, rather than treating SAP and structural calculations as a late-stage box-ticking exercise. Our piece on structural calculations for extensions explains what a structural engineer’s submission needs to contain, and for genuinely low-carbon structural detailing, a specialist like Xponexus can advise on reducing embodied carbon in beams and foundations too. Typical Building Control turnaround runs four to six weeks from a complete submission; incomplete SAP or missing U-value calculations are the most common cause of delay beyond that.
What should you budget for, and where does the money pay back fastest?
Fabric upgrades cost more upfront but pay back faster than most homeowners expect, and sequencing matters more than total spend. Cost comparisons across eco-specification extensions suggest pushing insulation from Part L minimum to “better” adds a modest premium to your build cost, typically single-digit percentage points, while cutting ongoing heating demand substantially.
Rough installed cost bands to budget against:
- Upgrading wall insulation from minimum to “better” specification: often an additional £30 to £60 per square metre of wall.
- Triple glazing over double glazing: roughly 15 to 25% premium on window and door costs.
- MVHR installation: £3,000 to £6,000 for a typical single-storey extension.
- Air source heat pump: £8,000 to £14,000 installed, offset by up to £7,500 through the Boiler Upgrade Scheme.
Combine fabric upgrades, an ASHP and a modest PV array and the typical payback horizon lands around 10 to 15 years, shorter if energy prices rise faster than forecast. VAT is worth checking with your builder: most extension work is charged at the standard rate, though certain energy-saving materials and heat pump installations can qualify for reduced VAT treatment, so confirm this before finalising your budget. For a fuller breakdown of what a typical rear extension costs in 2026, see our rear extension cost guide.
If cashflow is tight, spend first on fabric and airtightness, since that’s the layer you can’t easily upgrade later without disruptive remedial work, and add renewables once the building envelope is proven.
How do you cut embodied carbon without blowing the budget?
Timber and engineered timber generally carry a fraction of the embodied carbon of concrete and masonry per square metre of wall, largely because timber sequesters carbon during growth while cement production releases it. That doesn’t mean masonry is off the table. It means choosing timber frame where buildability allows shifts your extension’s carbon footprint significantly before you’ve specified a single insulation board.
Practical reuse tactics keep both carbon and cost down:
- Retain existing foundations where the extension footprint allows, subject to structural engineer sign-off.
- Reuse salvaged windows or doors internally, even if new units go into the extension itself.
- Specify wood fibre or cellulose insulation certified to FSC or PEFC standards over higher-carbon alternatives where budget allows.
- Ask suppliers for Environmental Product Declarations (EPDs) and recycled content statements before specifying structural or insulation products.
A documented low-waste extension project in south London combined fabric-first upgrades with an ASHP and PV, retaining materials wherever structurally sound, and achieved a substantially lower running cost alongside noticeably better comfort. Net-zero-focused guidance for UK extensions suggests pushing target U-values further, walls around 0.15 W/m²K and roofs around 0.11 W/m²K, when embodied and operational carbon are both priorities from the outset.
How should the extension sit on the plot for the best comfort?
Orientation decides more than most homeowners realise before the drawings exist. A rear extension facing south benefits from passive solar gain in winter, useful for cutting heating demand, but needs shading and ventilation planned from day one to avoid summer overheating. North-facing extensions rarely overheat but need more glazing or rooflights to feel bright.
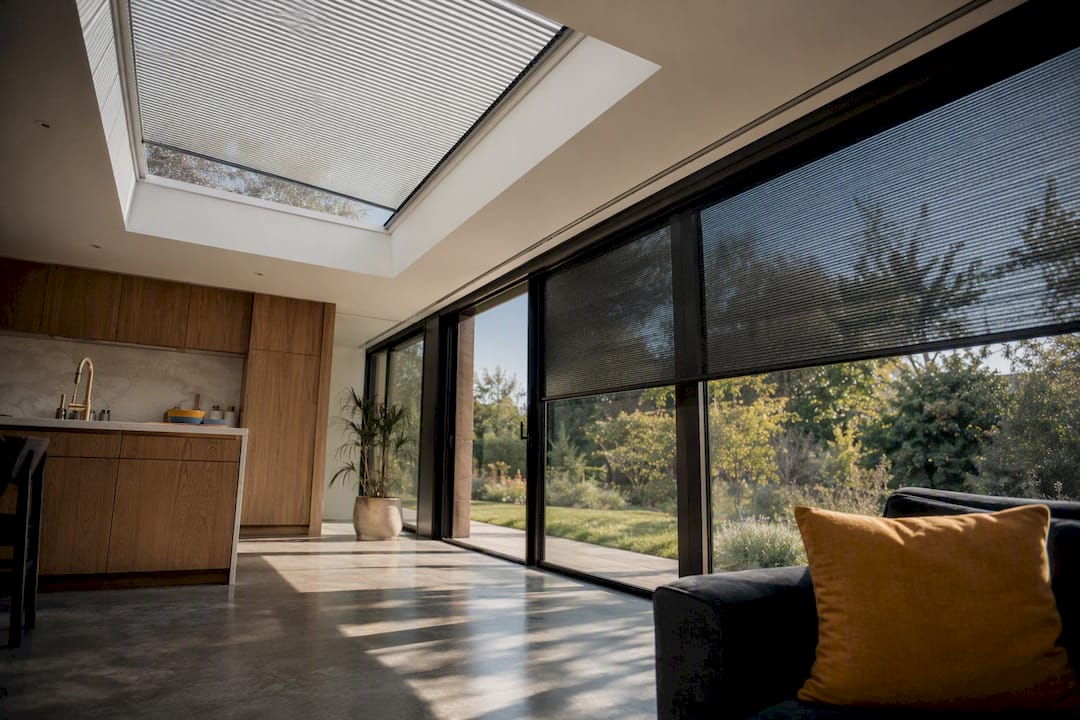
Thermal mass helps most where there’s genuine solar exposure to store and release. A concrete or screeded floor slab in a south-facing extension absorbs daytime heat and releases it slowly overnight, smoothing out temperature swings. In a shaded or north-facing extension, thermal mass adds cost without much comfort benefit, so a lighter, faster-warming construction often makes more sense.
Zoned glazing works well on constrained plots, common across London terraces where gardens are modest. Concentrate glazing on the garden-facing wall and roof, keep side returns more solid, and use a controlled rooflight over a specific zone, like a kitchen island, rather than glazing the entire roof.
Pro Tip: On a narrow London terrace, a single well-placed rooflight over the rear third of the extension often delivers more usable daylight than a full-width glazed roof, and it’s considerably easier to shade and ventilate properly.
Case study: how The Extension Works delivers energy-aware rear extensions
Turning these principles into a working extension usually means finding a team who treats fabric performance as standard, not an upgrade you have to ask for twice. The Extension Works runs an instant quote and online booking platform for single-storey rear extensions across Sutton, Morden, Hounslow, Bracknell and Aldershot, folding design, planning and construction into one in-house service rather than three separate contracts.
Some live 3D modelling tools let you see U-value and glazing decisions reflected in the actual layout before you commit, alongside a fixed VAT-inclusive price agreed upfront. Projects may get a dedicated team managing the process from initial sketches through to final sign-off, which matters when airtightness and junction detailing depend on consistent oversight rather than handoffs between separate designers and builders.
A workmanship warranty typically backs the finished build, giving homeowners a concrete point of accountability if anything, from a sealed junction to a commissioned MVHR unit, doesn’t perform as specified.
What are the practical steps from enquiry to handover?
- Set your brief early. Agree fabric and airtightness targets, budget tier (“good,” “better” or “premium”) and glazing ambitions before drawings start.
- Request SAP-ready drawings. Ask your designer for U-value calculations and a written overheating note alongside the architectural plans.
- Verify during construction. Schedule the blower-door test after first fix, and insist on commissioning documentation for MVHR and any heat pump installed.
- Collect your handover pack. Gather the airtightness certificate, SAP calculation, workmanship warranty and an operation guide for any mechanical systems before you sign off.
Ambition, budget and where the real value sits
Most homeowners don’t need Passivhaus certification to get most of the benefit. Targeting “better” rather than full certification usually delivers the bulk of the comfort and running-cost gains at a fraction of the cost and design complexity, and that’s where I’d point most budgets in England.
Spend early money on fabric and airtightness. These are the decisions you can’t easily revisit once the plaster’s up, whereas a heat pump or PV array can always be added or upgraded later if funds are tight now.
If a single point of accountability for performance outcomes matters to you, and for most homeowners juggling a full-time job it should, a managed design-and-build route removes the coordination risk between separate architects, engineers and builders pointing fingers at each other when a target is missed.
— Esskay
Get a performance-aware quote for your extension
Compare that against hiring an architect, then a separate structural engineer, then a builder, and coordinating Building Control submissions yourself, and the appeal of one team owning the whole outcome becomes obvious. The Extension Works folds design, planning and construction into a single in-house process, so the fabric decisions covered in this guide, U-values, airtightness, glazing, get built into your quote from day one rather than negotiated in afterwards.
Run your project through the instant extension quote tool to see a fixed, VAT-inclusive price and a live 3D model of your layout before you commit to anything. Every build comes with a 12-month workmanship warranty, and a dedicated team stays with your project from first sketch to final sign-off. If you’d rather talk through fabric targets and glazing options first, book a design consultation and get the numbers right before the drawings are finalised.
Sources
- Approved Document L: conservation of fuel and power (England)
- Homeowner’s guide to building an energy efficient extension (South Worcestershire Building Control)
- Eco-sustainable extension guide (ResiQuote)